
Hey everyone, welcome back to the blog! This is Utkarsh Raj, and I’m back with another blog on Java tutorials. In this blog, we’ll be diving into multi-threading. It’s going to be very similar to my previous tutorials, but this time, I’ll be covering all the important topics related to multi-threading, starting from the basics. So, if you don’t know anything about multi-threading, this blog is definitely for you.
You don’t need to read this entire blog in one go—take your time and read at your own pace. But trust me, the concepts I’m going to cover in this post will not only help you in your day-to-day life as a software engineer but will also be extremely useful when you’re preparing for interviews, whether it’s for SD1 or SD2 roles. These topics will also be crucial when you begin preparing for system design interviews.
Although these concepts are already available on the internet, they are often scattered across different sources. I felt it would be helpful to compile everything in a simpler, more organized way, bringing it all together in one blog for you to follow. This will make your preparation process easier and more efficient.
If you read this blog, I promise the concepts you learn here can be directly applied during your placement preparation, and you’ll be able to impress your interviewers. Believe me, very few SD1 freshers are familiar with these concepts. So, once you read this blog, go ahead and ask your college mates or classmates about these topics. I can assure you that 95% of them won’t know half of what I’m about to cover!
Whatever your motivation may be—whether it’s cracking interviews or learning something new—make sure to read this blog till the very end. And don’t forget to leave any questions in the comments. This will help me provide more valuable content for you, and your support motivates me to create even better blogs for you in the future!
What is Multi-threading?
Before diving into multi-threading, let’s first understand multitasking. In simple terms, multitasking means performing multiple tasks simultaneously or doing more than one task at the same time. Now, if we apply this concept to computers, when we say a computer is multitasking, it means the computer is running multiple programs in parallel. For example, humans often multitask, such as waking up in the morning, brushing their teeth, and listening to music at the same time. So, we can say that humans also multitask, but when it comes to computers, it’s about running different programs simultaneously.
There are two types of multitasking in computing: process-based multitasking and thread-based multitasking.
Process-based vs. Thread-based Multitasking
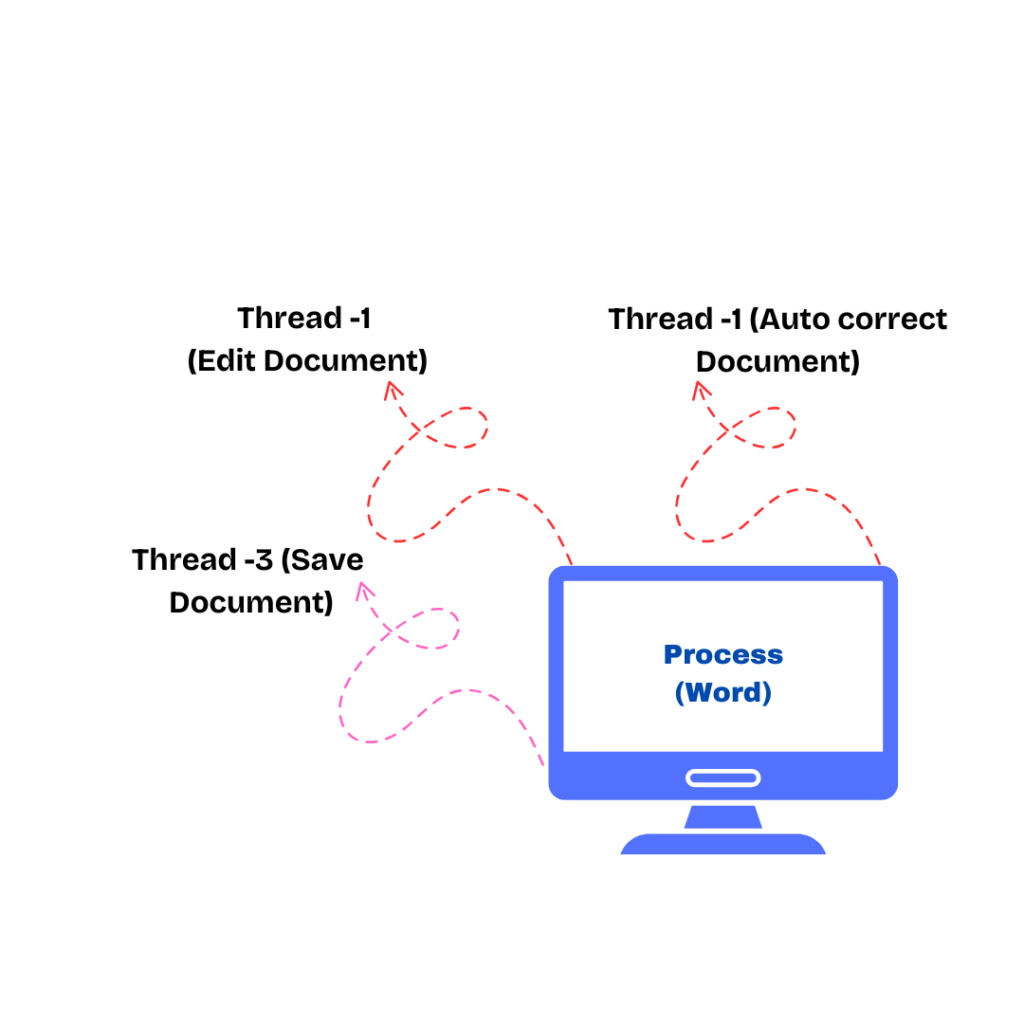
Let’s start with a simple example: Suppose you’re typing a document in MS Word, and at the same time, you’re drawing something in MS Paint. You may switch between these two programs frequently. While you’re doing this, both MS Word and MS Paint are running in parallel. This is process-based multitasking, where multiple programs run concurrently. You might be watching a movie in VLC Media Player while browsing the web in Google Chrome. This is process-based multitasking because separate programs are running simultaneously.
Now, let’s move to thread-based multitasking, which is a bit more specific. Let’s stick with the example of MS Word. While typing in MS Word, the autocorrect feature might be running in the background, checking your spelling as you type. Even though you’re actively typing, the autocorrect feature is also working in parallel. This is an example of thread-based multitasking.
In thread-based multitasking, the focus is on a single program, where multiple threads are running concurrently to perform different tasks. In process-based multitasking, different programs are running in parallel, whereas in thread-based multitasking, the focus is on running different functions within the same program.
Thread vs. Process
By now, you might already have an idea about the difference between threads and processes. Let’s break it down clearly, as this is an important concept often tested in interviews.
- Thread: A thread is an independent, sequential path of execution within a program. For example, in a program like MS Word, multiple threads run to handle different tasks (e.g., typing, spell-checking, formatting).
- Process: A process is a program in execution. Each program running on a computer is considered a process.
Since multiple threads work within a single program, they share the same memory space, which allows them to communicate more easily with each other. This makes context switching between threads less expensive than context switching between processes because processes don’t share the same memory space.
Communication between threads is also cheaper compared to communication between processes. If you switch between MS Word and MS Paint, it’s a more expensive operation for the CPU, but switching between threads within the same program is less costly.
Why Do We Need Multi-threading?
Let’s consider human behavior for a moment. Humans are multitaskers. For example, developers often have to wait for a long time when building a large codebase. Sometimes, it takes 30 minutes or even an hour for the build process to complete. Do developers just sit back and wait for the build to finish? No! Instead, they use this waiting time productively, by reading documentation, attending meetings, or even scrolling through Instagram. This is a form of multitasking!
Similarly, when working with computers, there are times when the CPU is idle, waiting for something to happen (e.g., waiting for user input). Multi-threading allows the CPU to use that idle time to perform other tasks, instead of sitting idle.
In a single-threaded environment, only one task can be executed at a time. This means that the program executes tasks sequentially, one after the other. When the CPU is waiting for input, it’s wasting precious cycles. With multi-threading, we can use this idle time to perform other tasks, improving the efficiency of the system.
Thread Class in Java
In Java, a thread is a lightweight process. The main thread is created automatically when a Java program starts, and when the main thread stops, the program stops.
If you want to create additional threads, you don’t need to explicitly create them — they can be created using the Thread class. Each thread runs its own sequence of instructions, and it can run in parallel with other threads. This allows multiple tasks to happen simultaneously within the same program.
In a multi-threaded environment, threads run in a shared memory space, meaning they can access the same data and code. This also means that threads in Java can communicate with each other easily, but they must be managed carefully to avoid conflicts.
Key Concepts in Multi-threading
In this part, we’ll cover three important concepts related to multi-threading in Java:
- Creating Threads: How to create custom threads and provide the code that the thread should execute.
- Accessing Common Data and Synchronization: How to handle shared data and ensure that threads access it safely.
- Thread States: Understanding how threads transition between different states during execution.
I know some of these topics might sound intimidating, but don’t worry — once we dive into them, you’ll find that they are much easier to understand. These are the concepts that we’ll be focusing on in this blog, and by the end, you’ll have a solid understanding of multi-threading in Java.
Let’s start with the first important topic: The Main Thread.
The main thread is an important concept in programming. When we run any single-threaded program, by “single-threaded” I mean a program that executes sequentially, a main thread is automatically created. Now, if we want to leverage a multi-threaded environment in Java and create our own custom threads, we need to create those threads programmatically. These threads will be spawned from the main thread itself. In other words, if you want to create threads in your program, they need to be created from the main thread, which is the starting point. That’s why we say that all other threads (child threads) are spawned from the main thread.
Now, let’s consider what happens when the main thread completes its execution. Even if the main method finishes executing, the program will continue to run if other threads or custom threads are still running and have not completed their tasks.
There are two key concepts to understand here: user threads and daemon threads. Let’s see the difference between them:
User threads: These are normal threads created by the program. If all user threads finish executing their tasks, the program will stop, regardless of whether any daemon threads are still running or not. User threads have priority in the program’s execution flow. The program will continue to run as long as there is at least one user thread running.
Daemon threads: These are background threads that don’t prevent the program from exiting. When the last user thread finishes executing, the JVM will terminate the program, even if daemon threads are still running. Daemon threads are considered to be at the mercy of the runtime system and will be stopped when all user threads are done, even if they haven’t completed their tasks.
If the main thread is a user thread, and there are two other user threads and one daemon thread running, the program will not stop executing as long as any user thread is still running. Once all the user threads finish their tasks, the program will stop, even if the daemon thread is still running.
To summarize:
- The JVM will not terminate the program as long as there is at least one user thread running.
- Daemon threads do not prevent the program from exiting. The program will exit when all user threads are finished, regardless of whether daemon threads are still running.
To create a daemon thread, we use the setDaemon() method of the Thread class. You need to call setDaemon(true) before starting the thread, like this:
Thread thread = new Thread();
thread.setDaemon(true); // Set this thread as a daemon thread
thread.start();
Now, let’s understand how we can create our own custom threads apart from the main thread. This can be done in two ways:
- Implementing the
java.lang.Runnableinterface - Extending the
Threadclass
Let’s dive into creating custom user threads and experimenting with them. Afterward, we’ll explore some of the methods available for threads and discuss why there are two ways of creating threads and which one is preferable.
Creating a Thread by Extending the Thread Class
Let’s start by creating a class called ThreadOne, which extends the Thread class. Here’s how it looks:
class ThreadOne extends Thread {
@Override
public void run() {
for (int i = 0; i < 5; i++) {
System.out.println("Inside ThreadOne: " + i);
}
}
}
In this code, we are overriding the run() method. The run() method is executed when the thread starts. Inside the run() method, you place the code that you want to execute for this specific thread. In our case, we are printing a simple message with a counter.
Now, in our main program, we’ll create an instance of the ThreadOne class and start it like this:
public class ThreadTester {
public static void main(String[] args) {
// Print a message from the main thread
System.out.println("Main is starting");// Create a thread instance
ThreadOne threadOne = new ThreadOne();
// Start the thread
threadOne.start();
// Print a message from the main thread
System.out.println("Main is exiting");
}
}
How the Thread Works
- Thread Creation: When you create a
ThreadOneobject, you’re creating a new thread of execution, which runs concurrently with the main thread. start()Method: Thestart()method does not start the thread immediately. Instead, it tells the JVM that you want to start this thread. The JVM will decide when to actually start the thread, and therun()method will be executed at that time.- Main Thread: The main thread will continue executing its code while the
ThreadOneruns concurrently. Since thread execution order is not guaranteed, the output may vary each time you run the program.
Example Output
The output could look like this:
Main is starting
Inside ThreadOne: 0
Inside ThreadOne: 1
Inside ThreadOne: 2
Main is exiting
Inside ThreadOne: 3
Inside ThreadOne: 4
or
Main is starting
Inside ThreadOne: 0
Inside ThreadOne: 1
Inside ThreadOne: 2
Inside ThreadOne: 3
Inside ThreadOne: 4
Main is exiting
The order in which the main thread and ThreadOne execute is not deterministic, as it depends on the JVM’s thread scheduling.
User Threads vs. Daemon Threads
By default, threads are user threads, which means the program will wait for all user threads to finish before exiting. However, you can also create daemon threads, which are background threads that don’t prevent the JVM from exiting when all user threads have finished.
To make a thread a daemon thread, you need to call the setDaemon(true) method before calling start(). Here’s how you can modify the code:
ThreadOne threadOne = new ThreadOne();
threadOne.setDaemon(true); // Set this thread as a daemon
threadOne.start();
If all user threads finish executing, the JVM can terminate even if daemon threads are still running.
Naming Threads
You can assign a name to a thread to make it more identifiable. You can either pass a name to the Thread constructor or use the setName() method.
For example, to assign a name when creating the thread:
class ThreadOne extends Thread {
public ThreadOne(String name) {
super(name); // Call the parent constructor to set the thread name
}
@Override
public void run() {
for (int i = 0; i < 5; i++) {
System.out.println(Thread.currentThread().getName() + " is executing: " + i);
}
}
}
In themainmethod, you can specify the name:
ThreadOne threadOne = new ThreadOne("Thread-One");
threadOne.start();
The output will include the thread name, which helps in distinguishing between multiple threads.
Summary
- There are two main ways to create a custom thread in Java: by extending the
Threadclass or by implementing theRunnableinterface. - When you extend the
Threadclass, you override therun()method to specify the code that the thread will execute. - The
start()method triggers the asynchronous execution of the thread. - Threads are created as user threads by default. If no user threads are running, the program can terminate even if daemon threads are still running.
- Thread names can be set to help identify different threads in the program.
Explanation: Thread Creation Methods in Java
In Java, you can create a thread in two main ways:
- By Extending the
ThreadClass:- The
Threadclass has arun()method that you can override to define the thread’s task. After overriding therun()method, you can create an instance of theThreadsubclass and call itsstart()method to begin execution in a new thread.
- The
- By Implementing the
RunnableInterface:- The
Runnableinterface provides arun()method that you can implement in a class. You then pass an instance of that class to aThreadobject. Once you call thestart()method on theThread, therun()method of theRunnableis executed.
- The
Choosing Between Extending Thread and Implementing Runnable
- Extend
Thread: You can extend theThreadclass if you don’t need to extend any other class. However, this method is not flexible because Java only allows single inheritance, so you cannot extend multiple classes. - Implement
Runnable: This approach is preferred when your class needs to extend another class (other thanThread) or when you need to implement multiple interfaces. Since Java supports multiple interface implementations, this is the more flexible method.
Why Implement Runnable?
Implementing Runnable is often considered the best practice. It decouples the task (the run() method) from the thread management. You can pass the same Runnable object to multiple Thread objects, and it makes your code cleaner and more flexible.
Program with Both Methods
// Method 1: Extending Thread class
class MyThread1 extends Thread {
@Override
public void run() {
for (int i = 0; i < 5; i++) {
System.out.println(Thread.currentThread().getName() + " - Thread 1, iteration " + i);
}
}
}
// Method 2: Implementing Runnable interface
class MyThread2 implements Runnable {
@Override
public void run() {
for (int i = 0; i < 5; i++) {
System.out.println(Thread.currentThread().getName() + " - Thread 2, iteration " + i);
}
}
}
public class ThreadExample {
public static void main(String[] args) {
// Method 1: Create and start a thread by extending the Thread class
MyThread1 thread1 = new MyThread1();
thread1.setName("Thread-1");
thread1.start();
// Method 2: Create and start a thread by implementing the Runnable interface
MyThread2 runnable = new MyThread2();
Thread thread2 = new Thread(runnable);
thread2.setName(“Thread-2”);
thread2.start();
// Main thread (current thread)
for (int i = 0; i < 5; i++) {
System.out.println(Thread.currentThread().getName() + ” – Main thread, iteration ” + i);
}
}
}
Explanation of the Program:
Method 1 (Extending
Thread):- We created the
MyThread1class, which extendsThreadand overrides therun()method. Therun()method contains the code that will be executed when the thread is started. - After creating an instance of
MyThread1, we call thestart()method to start the thread, which will internally call therun()method.
- We created the
Method 2 (Implementing
Runnable):- We created the
MyThread2class, which implements theRunnableinterface and provides an implementation for therun()method. - We then create a
Threadobject, passing an instance ofMyThread2(which implementsRunnable) to theThreadconstructor. - Calling
start()on theThreadobject triggers the execution of therun()method of theRunnableinstance.
- We created the
Main Thread:
- The
main()method is executed by the main thread. We simulate a task in the main thread by printing a message in a loop.
- The
Output (Example):
main - Main thread, iteration 0
Thread-1 - Thread 1, iteration 0
Thread-2 - Thread 2, iteration 0
main - Main thread, iteration 1
Thread-1 - Thread 1, iteration 1
Thread-2 - Thread 2, iteration 1
main - Main thread, iteration 2
Thread-1 - Thread 1, iteration 2
Thread-2 - Thread 2, iteration 2
main - Main thread, iteration 3
Thread-1 - Thread 1, iteration 3
Thread-2 - Thread 2, iteration 3
main - Main thread, iteration 4
Thread-1 - Thread 1, iteration 4
Thread-2 - Thread 2, iteration 4
In this output:
- The main thread executes its own
run()method. - The
MyThread1andMyThread2threads execute their respectiverun()methods, printing their own messages.
Key Points:
- Threads in Java can be created by either extending the
Threadclass or by implementing theRunnableinterface. - The
start()method triggers the execution of therun()method in a new thread. - The
run()method contains the code to be executed in the new thread.
In a multi-threaded environment, race conditions occur when multiple threads attempt to modify shared resources simultaneously, resulting in inconsistent or erroneous behavior. For example, consider a cinema booking system where multiple threads are trying to book a seat from a limited number of available seats. If two or more threads check if a seat is available and then try to book the same seat at the same time, it could lead to problems like overbooking (more tickets sold than available seats).
To avoid this, we need to ensure that only one thread at a time is allowed to modify the shared resource (in this case, the remainingSeats variable). This is where synchronization comes in.
We can use the synchronized keyword in Java to ensure that only one thread can execute a critical section of the code at a time. This is done by acquiring a lock before entering the critical section, and releasing the lock when it is done.
Code Example: Implementing a Synchronized Stack (Critical Section)
Here is the corrected Java code that uses synchronization to prevent race conditions while pushing and popping from a stack.
public class CinemaBooking {
public static void main(String[] args) {
// Create a stack with a capacity of 5 (seats available for booking)
Stack stack = new Stack(5);
// Create two threads: one for pushing (booking seats) and one for popping (cancelling or removing a booking)
Thread t1 = new Thread(() -> {
for (int i = 0; i < 10; i++) {
stack.push(100); // Simulate booking a seat
}
});
Thread t2 = new Thread(() -> {
for (int i = 0; i < 10; i++) {
stack.pop(); // Simulate cancelling a booking or removing a seat
}
});
// Start both threads
t1.start();
t2.start();
}
}
class Stack {
private int[] stack;
private int top;
private int capacity;
// Constructor
public Stack(int capacity) {
this.capacity = capacity;
this.stack = new int[capacity];
this.top = -1; // Initially, the stack is empty
}
// Check if the stack is empty
public synchronized boolean isEmpty() {
return top < 0;
}
// Check if the stack is full
public synchronized boolean isFull() {
return top >= stack.length – 1;
}
// Push an element onto the stack (book a seat)
public synchronized boolean push(int element) {
// Check if the stack is full before pushing
if (isFull()) {
System.out.println(“Stack is full, cannot book more seats.”);
return false;
}
// Simulate a delay (e.g., making DB calls) before booking the seat
try {
Thread.sleep(1000); // Simulating delay in booking
} catch (InterruptedException e) {
e.printStackTrace();
}
// Increment the top and add the element to the stack
stack[++top] = element;
System.out.println(“Seat booked, remaining seats: ” + (capacity – top – 1));
return true;
}
// Pop an element from the stack (cancel a booking)
public synchronized void pop() {
// Check if the stack is empty before popping
if (isEmpty()) {
System.out.println(“No seats to cancel.”);
return;
}
// Simulate a delay (e.g., making DB calls) before cancelling the booking
try {
Thread.sleep(100); // Simulating delay in cancelling
} catch (InterruptedException e) {
e.printStackTrace();
}
// Decrement the top and invalidate the value at that index
int element = stack[top–];
System.out.println(“Seat cancelled, remaining seats: ” + (capacity – top – 1));
}
}
Key Points and Improvements:
Thread Safety with
synchronized:- The
push()andpop()methods are synchronized. This ensures that only one thread can execute these methods at a time, preventing race conditions. - When one thread enters the synchronized block of a method, other threads are blocked from entering until the first thread releases the lock.
- The
Simulating Delays:
- The
Thread.sleep()method simulates a delay (e.g., making database calls or complex operations), which allows the race condition to manifest. Without synchronization, multiple threads could modify the shared resource (topin the stack) simultaneously, causing incorrect updates.
- The
Race Condition:
- Without synchronization, multiple threads could access and modify the
stackarray at the same time, causing inconsistent states (e.g., invalid indices or overbooking). This is resolved by ensuring that only one thread can access the critical sections at a time.
- Without synchronization, multiple threads could access and modify the
Thread Execution:
- Two threads are created: one for pushing (booking seats) and another for popping (cancelling bookings). Each thread performs its operation 10 times, and synchronization ensures that the
push()andpop()methods are safely executed.
- Two threads are created: one for pushing (booking seats) and another for popping (cancelling bookings). Each thread performs its operation 10 times, and synchronization ensures that the
Output:
This will produce output like:
Seat booked, remaining seats: 4
Seat booked, remaining seats: 3
Seat cancelled, remaining seats: 4
Seat booked, remaining seats: 3
Conclusion:
In a multi-threaded application, ensuring thread safety is crucial when multiple threads interact with shared resources. The synchronized keyword is an easy way to achieve this, preventing race conditions and ensuring consistent and correct behavior.
1. Synchronized Methods vs. Synchronized Blocks
- Synchronized Methods: When a method is marked as
synchronized, it ensures that only one thread at a time can execute that method on the same instance of the class.- For instance methods, the lock used is the instance of the object (
this). - For static methods, the lock used is the class object itself (i.e.,
ClassName.class).
- For instance methods, the lock used is the instance of the object (
- Synchronized Blocks: A
synchronizedblock allows synchronization of a specific part of a method. This way, only the critical section of code gets locked, improving performance by reducing the scope of the synchronization.- In this case, an explicit lock object is required (it can be any object, like a
new Object()or an existing object).
- In this case, an explicit lock object is required (it can be any object, like a
2. Lock Object:
- Any object in Java can act as a lock. Primitive types like
intcannot be used as locks, but their wrapper classes (likeInteger) can be. The lock object controls access to the synchronized code block, ensuring that only one thread at a time can execute the code within it.
3. Synchronized Methods on Different Threads:
- If two synchronized methods are accessing shared resources using the same lock, they are mutually exclusive. This means if one thread holds the lock for one method, another thread cannot access any synchronized method on the same object.
- To resolve this, you can use different locks for different synchronized methods. However, if both methods need to manipulate the same resource in a way that requires mutual exclusion (like a stack where both
push()andpop()methods modify the same data), using separate locks may not solve the problem.
4. Thread Synchronization with Multiple Threads:
- If multiple threads attempt to access the same synchronized method, they will have to wait for the lock to be released by the thread that currently holds it. If two synchronized methods share the same lock object, all threads will be blocked from entering any synchronized method that uses that lock until the thread holding it finishes.
5. Static Methods and Synchronization:
- Static synchronized methods: Since static methods are not associated with an instance of the object, you synchronize them on the class object, using
ClassName.classas the lock.
6. Execution Flow in Synchronized Methods:
- A thread that is inside a synchronized method can call other synchronized methods on the same object. The thread is not blocked by the second synchronized method, since it already holds the lock.
- Non-synchronized methods can be called at any time by other threads, regardless of whether they are inside a synchronized method.
Summary of Key Rules of Synchronization:
- A thread must acquire the object lock before entering a synchronized method or block.
- Once a thread has acquired the lock, no other thread can execute any synchronized methods on that object (unless they are in different objects or the lock is different).
- Static methods use the class object (
ClassName.class) as the lock, while instance methods use the current instance (this) as the lock.
Consider the scenario where you have multiple threads, such as T1, T2, T3, etc., trying to access synchronized methods (like push and pop methods in a stack). If both methods are synchronized on the same lock object, one thread can only access one method at a time. For example, if T1 is waiting for the lock to execute the push method, and T2 is executing the pop method, T1 will not be able to execute the pop method either because both methods are synchronized on the same lock object.
If you use different locks for each method (lock1 for push and lock2 for pop), different threads can execute the push and pop methods simultaneously. However, in the case of a stack, you need to ensure that no thread can execute the pop method while another thread is executing the push method, as this could lead to an inconsistent stack state. Therefore, you should use the same lock for both methods.
You can synchronize an entire method by using the synchronized keyword on the method signature. If you want to synchronize a specific part of a method, you can use a synchronized block with an explicit lock. When using the synchronized keyword on a method, Java implicitly uses the instance of the object (this) as the lock. For static methods, the class itself is used as the lock.
public class Stack {
private int top = -1;private int[] stack = new int[5];
// Lock object for synchronization
private final Object lock = new Object();
// Synchronized push method
public void push(int value) {
synchronized (lock) {
if (top < stack.length – 1) {
stack[++top] = value;
System.out.println(“Pushed: ” + value);
} else {
System.out.println(“Stack is full”);
}
}
}
// Synchronized pop method
public int pop() {
synchronized (lock) {
if (top >= 0) {
int value = stack[top–];
System.out.println(“Popped: ” + value);
return value;
} else {
System.out.println(“Stack is empty”);
return -1;
}
}
}
// Alternative method to synchronize the entire method
public synchronized void pushAlt(int value) {
if (top < stack.length – 1) {
stack[++top] = value;
System.out.println(“Pushed (Alt): ” + value);
} else {
System.out.println(“Stack is full”);
}
}
// Static synchronized method (using class lock)
public static synchronized void staticMethod() {
System.out.println(“Static method synchronized”);
}
public static void main(String[] args) {
Stack stack = new Stack();
// Example threads
Thread t1 = new Thread(() -> stack.push(1));
Thread t2 = new Thread(() -> stack.push(2));
Thread t3 = new Thread(() -> stack.pop());
t1.start();
t2.start();
t3.start();
}
}
Explanation of the Code:
- Synchronized Block: In the
pushandpopmethods, asynchronizedblock is used with a specific lock object (lock). This ensures that only one thread can execute either of these methods at any time. - Synchronized Method: In the
pushAltmethod, thesynchronizedkeyword is used directly in the method signature, which synchronizes the entire method. The lock used behind the scenes is the instance of the object (this). - Static Synchronized Method: The
staticMethodis synchronized using the class lock. Since it’s a static method, we use the class object as the lock, ensuring that only one thread can execute this method at a time across all instances.
Important Notes:
- If a thread is inside a synchronized method or block, other threads that want to execute synchronized methods or blocks on the same lock will have to wait.
- Static methods are synchronized on the class object (not
this), meaning that the lock is shared across all instances of the class.
Thread Locking and Synchronization
When a thread acquires an object lock, it blocks any other thread from accessing the same shared resource until it relinquishes the lock. If a thread cannot immediately acquire the lock, it is blocked and must wait for the lock to become available. Once a thread exits a synchronized block, the lock is released. However, the program should not assume the order in which locks are granted, as this depends on the platform’s CPU scheduling.
You might wonder why the sleep() method is used. This increases the chances of a thread being interrupted or corrupted by another thread while the first one is sleeping. This demonstrates how concurrency can lead to unexpected behavior if synchronization is not handled correctly.
Static vs Instance Synchronized Methods
If a class contains both static synchronized methods and synchronized instance methods, they operate independently. The static synchronized method locks on the class object, while the instance methods lock on individual objects. This means they can run simultaneously on different threads because they don’t share the same lock.
Moreover, when a subclass overrides a synchronized method from its superclass, it can choose whether to maintain the synchronization. This allows for flexibility in thread safety depending on the subclass’s requirements.
Race Condition and Synchronization
A race condition occurs when multiple threads simultaneously access and modify a shared variable, leading to an inconsistent state. For example, consider a stack where multiple threads try to push and pop elements at the same time. Without proper synchronization, the stack’s state can become corrupted, resulting in errors like an ArrayIndexOutOfBoundsException. This can be prevented by using synchronized methods or blocks, ensuring that only one thread modifies the stack at a time.
Synchronized Blocks and Explicit Locks
In a synchronized block, you need to pass an explicit lock. If this lock is null, a NullPointerException will be thrown. A synchronized block allows finer control over which resources to lock, providing more flexibility than synchronizing the entire method.
Thread Safety
Thread safety refers to the design of classes that maintain consistency and correctness when multiple threads access them concurrently. For example, StringBuffer is thread-safe, whereas StringBuilder is not. Designing thread-safe classes is crucial when dealing with shared data to avoid inconsistencies.
Volatile Keyword in Java
The volatile keyword in Java ensures that a variable’s value is directly read from and written to main memory, bypassing thread-local caches. This is crucial in multi-threaded environments, where multiple threads may access and modify a shared variable. Without volatile, threads could be working with stale data from their local caches, leading to inconsistencies.
For example, consider two threads working with a shared boolean flag. If thread 1 changes the flag in its local cache and does not update it in the main memory, thread 2 may still read the old value from its cache. By declaring the flag as volatile, we ensure that all threads see the latest value, preventing inconsistent behavior.
Singleton Pattern and Volatile Keyword
In the Singleton design pattern, only one instance of a class is allowed. To prevent multiple threads from creating new instances, we use synchronization. However, without the volatile keyword, multiple threads might still create separate instances due to caching issues, violating the Singleton pattern. Declaring the instance as volatile ensures that all threads access the most up-to-date value of the instance, thereby maintaining the Singleton constraint.
Example Code for Singleton Pattern
public class TVSet {
private static volatile TVSet instance;
private TVSet() {
// Private constructor to prevent instantiation
}
public static TVSet getInstance() {
if (instance == null) {
synchronized (TVSet.class) {
if (instance == null) {
instance = new TVSet();
}
}
}
return instance;
}
}
In this example, the TVSet class uses the volatile keyword for the instance variable to ensure that the latest instance is visible to all threads, even if they are reading from their local caches. Without volatile, there could be a situation where multiple threads simultaneously create new instances, breaking the Singleton pattern.
Producer-Consumer Problem
The producer-consumer problem involves a queue where multiple threads can either produce items or consume them. Synchronization is crucial here to prevent multiple threads from accessing the queue simultaneously, leading to inconsistencies. The solution typically involves using wait/notify mechanisms or blocking queues to manage the flow of data between producer and consumer threads efficiently.
Here’s a simple implementation of the Producer-Consumer problem using Java. In this code, a producer thread produces items and adds them to a queue, while a consumer thread consumes items from the queue. The wait() and notify() mechanisms are used for synchronization to ensure that producers don’t add items when the queue is full and consumers don’t try to consume items when the queue is empty.
import java.util.LinkedList;
import java.util.Queue;
class SharedQueue {
private final int MAX_CAPACITY = 10;
private final Queue<Integer> queue = new LinkedList<>();
// Method for producer to add an item to the queue
public synchronized void produce(int item) throws InterruptedException {
while (queue.size() == MAX_CAPACITY) {
wait(); // Wait until the queue has space
}
queue.add(item);
System.out.println("Produced: " + item);
notify(); // Notify the consumer that there's an item available
}
// Method for consumer to remove an item from the queue
public synchronized int consume() throws InterruptedException {
while (queue.isEmpty()) {
wait(); // Wait until the queue has an item
}
int item = queue.poll();
System.out.println("Consumed: " + item);
notify(); // Notify the producer that there's space in the queue
return item;
}
}
class Producer extends Thread {
private final SharedQueue sharedQueue;
public Producer(SharedQueue sharedQueue) {
this.sharedQueue = sharedQueue;
}
@Override
public void run() {
try {
for (int i = 1; i <= 20; i++) {
sharedQueue.produce(i);
Thread.sleep(100); // Simulating time taken to produce
}
} catch (InterruptedException e) {
Thread.currentThread().interrupt();
}
}
}
class Consumer extends Thread {
private final SharedQueue sharedQueue;
public Consumer(SharedQueue sharedQueue) {
this.sharedQueue = sharedQueue;
}
@Override
public void run() {
try {
for (int i = 1; i <= 20; i++) {
sharedQueue.consume();
Thread.sleep(150); // Simulating time taken to consume
}
} catch (InterruptedException e) {
Thread.currentThread().interrupt();
}
}
}
public class ProducerConsumerExample {
public static void main(String[] args) {
SharedQueue sharedQueue = new SharedQueue();
Producer producer = new Producer(sharedQueue);
Consumer consumer = new Consumer(sharedQueue);
producer.start();
consumer.start();
}
}
Blocking Queue Implementation and Thread Synchronization
We are going to implement a blocking queue with two types of threads: one set of threads will try to push items into the queue, while the other set will try to remove items. In this multi-threaded environment, only one thread can access the queue at a time to maintain thread safety. To achieve this, we will use synchronization to control access to the queue and ensure that threads don’t interfere with each other.
Queue Initialization and Synchronization
We will create a queue and initialize it with a maximum capacity. The queue is implemented using a LinkedList. We will implement two methods: one for adding items (add()) and one for removing items (remove()). Both methods will be synchronized to prevent race conditions.
public class BlockingQueue {
private LinkedList<Integer> queue;
private int capacity;
public BlockingQueue(int capacity) {
this.capacity = capacity;
this.queue = new LinkedList<>();
}
public synchronized boolean add(int item) {
if (queue.size() == capacity) {
return false; // Queue is full
}
queue.add(item);
return true;
}
public synchronized int remove() {
if (queue.size() == 0) {
return -1; // Queue is empty
}
return queue.remove();
}
}
Synchronization Using Locks
In the add() and remove() methods, synchronization is required to ensure that multiple threads do not concurrently access the queue, as this could lead to inconsistencies. The queue object itself is used as a lock to ensure that only one thread can access the critical section at any time.
Handling Full and Empty Queues
In the add() method, before adding an item, we check if the queue is full. If it is, the thread must wait until space is available. Similarly, in the remove() method, if the queue is empty, the thread must wait until an item is added. To manage this, we use the wait() and notifyAll() methods from the Object class.
Waiting for Space or Items
If a thread cannot add or remove an item due to the queue’s state (full or empty), it will wait for the condition to be true (i.e., when space becomes available or an item is added). When space is freed up or an item is added, the thread will be notified using the notifyAll() method.
public synchronized boolean add(int item) throws InterruptedException {
while (queue.size() == capacity) {
wait(); // Wait until there is space
}
queue.add(item);
notifyAll(); // Notify all threads waiting for space
return true;
}
public synchronized int remove() throws InterruptedException {
while (queue.size() == 0) {
wait(); // Wait until an item is available
}
int item = queue.remove();
notifyAll(); // Notify all threads waiting for an item
return item;
}
Thread Communication
In the add() and remove() methods, the wait() method is used to block the thread if the queue is full (in the case of the add() method) or empty (in the case of the remove() method). These threads are then notified when the condition changes, such as when space becomes available or an item is added/removed.
- The
add()method useswait()if the queue is full andnotifyAll()when an item is added. - The
remove()method useswait()if the queue is empty andnotifyAll()when an item is removed.
Handling Multiple Threads Trying to Access the Queue
In a multi-threaded environment, multiple threads can compete to access the queue. The wait() method allows threads to wait for a condition (like space being available) before attempting to execute further. However, to avoid the “spurious wakeup” problem where a thread wakes up without the condition being met, we use a while loop instead of an if statement. This ensures that the thread will check the condition again after being notified.
public synchronized boolean add(int item) throws InterruptedException {
while (queue.size() == capacity) {
wait(); // Wait until there is space
}
queue.add(item);
notifyAll(); // Notify all waiting threads
return true;
}
public synchronized int remove() throws InterruptedException {
while (queue.size() == 0) {
wait(); // Wait until an item is available
}
int item = queue.remove();
notifyAll(); // Notify all waiting threads
return item;
}
Summary
- BlockingQueue: A queue that blocks threads if they try to add an item when it’s full or remove an item when it’s empty.
- Synchronization: We use synchronization to ensure that only one thread can modify the queue at a time.
- Thread Communication: Threads are blocked using
wait()and are notified usingnotifyAll()when they can resume execution. Thewhileloop ensures that threads recheck the conditions after being notified.
Thread States and Transitions in Java
In Java, when a thread is created, it starts in the “new” state. Once the start() method is called, it transitions into the “ready to run” state. After being scheduled by the operating system, the thread enters the “running” state. When the run() method completes, the thread enters the “dead” state. Once a thread is dead, it cannot be started again.
Non-Runnable States: Sleeping and Blocked
A thread can enter several non-runnable states. For instance, when the Thread.sleep() method is called, the thread enters the “sleeping” state, where it is not executing but still holds any locks it acquired. The thread will remain in the sleeping state until the specified time elapses or another thread interrupts it.
Another non-runnable state is the “blocked” state, which occurs when a thread is waiting for some external input or resource. Threads can also be blocked when they are trying to acquire a lock on a synchronized block or method.
Waiting and Lock Acquisition States
When a thread calls wait(), it enters a “waiting” state. If the thread receives a notification (via notify() or notifyAll()), it does not immediately return to the “running” state. Instead, it enters the “blocked for lock acquisition” state, where it waits to acquire the lock needed to proceed. Once the lock is acquired, the thread transitions to the “ready to run” state and can resume execution.
Thread States Enum
Java provides a Thread.State enum that helps track the state of a thread. The possible states include:
NEW: The thread has been created but has not started.RUNNABLE: The thread is ready and waiting to be scheduled by the JVM.BLOCKED: The thread is waiting for a lock to proceed.WAITING: The thread is waiting indefinitely for another thread to perform a particular action.TIMED_WAITING: The thread is waiting for a specific amount of time (e.g., inThread.sleep()).TERMINATED: The thread has finished executing.
The state of a thread can be checked using the Thread.getState() method, which returns a value from the Thread.State enum.
Thread State Transitions
Consider a thread that is running. If it calls sleep(), it will transition to the “sleeping” state. When the sleep time is over, the thread will return to the “ready to run” state. Similarly, when a thread enters a loop, it can be in the “running” state, and once it terminates, it will enter the “terminated” state.
The main method of the program can repeatedly check and print the state of the thread until it reaches the “terminated” state, at which point the program exits.
Yield Method
The Thread.yield() method suggests that the current thread gives up its remaining time slice and allows other threads to execute. However, calling yield() is just a hint to the JVM, and there is no guarantee that the current thread will immediately be moved to the “ready to run” state.
Sleep and Interrupted Exceptions
When Thread.sleep() is called, the thread goes into the “sleeping” state for a specified time. If the sleep duration completes, the thread moves to the “ready to run” state. If another thread interrupts the sleeping thread, it will immediately move back to the “ready to run” state and throw an InterruptedException when it resumes execution. This is why the sleep() method should always be enclosed in a try-catch block to handle interruptions.
Similarly, when a thread calls wait() and another thread calls notify(), the waiting thread moves to the “blocked for lock acquisition” state, where it must compete for the lock before resuming execution.
Waiting, Notifying, and Interrupted States
When a thread is in the “waiting for notification” state, it can be awakened by one of three events:
- Another thread calls
notify()ornotifyAll(). - The specified time in the
wait(long timeout)method has elapsed. - Another thread interrupts the waiting thread.
When a thread is awakened, it does not immediately enter the “ready to run” state. Instead, it first enters the “blocked for lock acquisition” state, where it must acquire the lock before it can proceed.
Handling Interrupted Exceptions
A thread in the “waiting” state can be interrupted by another thread, causing it to transition to the “blocked for lock acquisition” state. Once the thread gets a chance to run, it will throw an InterruptedException. Therefore, any code that calls wait() or sleep() should be wrapped in a try-catch block to handle this exception.
Difference Between Timed-Out and Interrupted Threads
The key difference between a thread being interrupted and a thread timing out is that when a thread is interrupted, it will immediately throw an InterruptedException when it resumes. However, if a thread is merely timed out (for example, by passing a timeout to the wait() method), it does not know whether it was notified or if the time elapsed. There is no exception thrown in the case of a timeout, and the thread proceeds normally once the timeout period has passed.
Code Example for Thread States
The following example demonstrates the different states of a thread using Thread.getState():
class ThreadStateExample extends Thread {
public void run() {
try {
Thread.sleep(1000); // Sleep for 1 second
} catch (InterruptedException e) {
e.printStackTrace();
}
}
public static void main(String[] args) {
ThreadStateExample thread = new ThreadStateExample();
System.out.println("Thread state before start: " + thread.getState()); // NEW
thread.start();
while (thread.isAlive()) {
System.out.println("Thread state: " + thread.getState());
try {
Thread.sleep(500); // Sleep for half a second
} catch (InterruptedException e) {
e.printStackTrace();
}
}
System.out.println("Thread state after completion: " + thread.getState()); // TERMINATED
}
}
Conclusion
In summary, threads in Java transition between various states based on the actions they perform (such as sleep(), wait(), notify(), or acquiring locks). By understanding these states, you can write more efficient and controlled multi-threaded applications. It is also crucial to handle interruptions properly, especially when using methods like sleep() and wait(), to ensure that threads behave as expected and do not get stuck indefinitely.
Thread Join in Java
The thread.join() method is used to make one thread wait for another thread to complete before continuing its execution. When join() is called on a thread, the current thread is blocked until the thread on which join() was called finishes its execution. This ensures that the calling thread (usually the main thread) waits for the child thread to complete before it proceeds. If a time is specified in join(), the main thread will wait only for that amount of time for the child thread to complete. After this time has elapsed, the main thread will resume execution regardless of whether the child thread has finished.
public class ThreadJoinExample {
public static void main(String[] args) {
Thread t = new Thread(new Runnable() {
@Override
public void run() {
System.out.println("Child Thread Executing");
}
}, "Child Thread");
t.start(); // Start the thread
try {
t.join(); // Main thread will wait for the child thread to finish
} catch (InterruptedException e) {
System.out.println("Main Thread Interrupted");
}
System.out.println("Main Thread Exiting");
}
}
Thread Priorities in Java
In Java, each thread has a priority, which can be set using setPriority(int priority) and checked with getPriority(). Thread priorities influence the thread scheduling mechanism, but the behavior can depend on the platform and JVM implementation. Java’s default thread priority is Thread.NORM_PRIORITY (which equals 5). The minimum priority is Thread.MIN_PRIORITY (1), and the maximum is Thread.MAX_PRIORITY (10). However, setting the thread priority is advisory, and there is no guarantee that the JVM will honor it. This behavior may vary between platforms.
public class ThreadPriorityExample {
public static void main(String[] args) {
Thread thread1 = new Thread(() -> {
System.out.println("Thread 1 Executing");
});
thread1.setPriority(Thread.MAX_PRIORITY); // Setting high priority
System.out.println("Thread 1 Priority: " + thread1.getPriority());
thread1.start();
}
}
Thread Scheduling in Java
Thread scheduling refers to how the JVM allocates CPU time to different threads. It is highly dependent on the underlying operating system. There are two common scheduling strategies:
Preemptive Scheduling: If a thread with a higher priority becomes ready to run, the current running thread may be preempted to allow the higher priority thread to execute.
Time-Sliced (Round Robin) Scheduling: The scheduler allocates CPU time to threads in fixed time slices, ensuring that all threads are given a chance to execute.
In either case, Java provides no guarantee that thread priorities or scheduling strategies will be followed exactly as specified. JVM implementations can vary.
public class ThreadSchedulingExample {
public static void main(String[] args) {
Thread thread1 = new Thread(() -> System.out.println("Thread 1 Executing"));
Thread thread2 = new Thread(() -> System.out.println("Thread 2 Executing"));
thread1.setPriority(Thread.MIN_PRIORITY);
thread2.setPriority(Thread.MAX_PRIORITY);
thread1.start();thread2.start();
}
}
Deadlock in Java
A deadlock occurs when two or more threads are blocked forever because each one is waiting for the other to release a resource. A common deadlock scenario involves two threads that hold locks on different resources and are waiting for each other to release them.
Here’s an example to create a deadlock situation:
public class DeadlockExample {
private static final Object lock1 = new Object();
private static final Object lock2 = new Object();
public static void main(String[] args) {
Thread thread1 = new Thread(() -> {
synchronized (lock1) {
System.out.println("Thread 1: Holding lock 1...");
try { Thread.sleep(50); } catch (InterruptedException e) {}
synchronized (lock2) {
System.out.println("Thread 1: Acquired lock 2");
}
}
});
Thread thread2 = new Thread(() -> {
synchronized (lock2) {
System.out.println("Thread 2: Holding lock 2...");
try { Thread.sleep(50); } catch (InterruptedException e) {}
synchronized (lock1) {
System.out.println("Thread 2: Acquired lock 1");
}
}
});
thread1.start();
thread2.start();
}
}
Deadlock Prevention
To prevent deadlocks, ensure that threads acquire locks in a consistent order. If both threads always acquire the locks in the same order, deadlocks can be avoided. Here’s how you can avoid the deadlock in the above example:
public class DeadlockPreventionExample {
public static void main(String[] args) {
Thread thread1 = new Thread(() -> {
synchronized (lock1) {
System.out.println("Thread 1: Holding lock 1...");
try { Thread.sleep(50); } catch (InterruptedException e) {}
synchronized (lock2) {
System.out.println("Thread 1: Acquired lock 2");
}
}
});Thread thread2 = new Thread(() -> {
synchronized (lock1) { // Acquire lock1 first
System.out.println("Thread 2: Holding lock 1...");
try { Thread.sleep(50); } catch (InterruptedException e) {}
synchronized (lock2) { // Then acquire lock2
System.out.println("Thread 2: Acquired lock 2");
}
}
});
thread1.start();
thread2.start();
}
}